A Step-by-Step Guide on How to Create Business Professional Email in cPanel
In the dynamic landscape of business, effective communication is the linchpin of success. One crucial aspect of professional communication is a business email that not only reflects your brand but also establishes trust with clients and partners. Fortunately, Juju Hosting’s cPanel simplifies the process of creating a business professional email. In this step-by-step guide, we’ll walk you through the process and even explore how to access your emails through Webmail.
Step 1: Log in to cPanel
Begin by logging in to your Juju Hosting cPanel account. Once logged in, navigate to the Email section to access the powerful tools for managing your email accounts.
Step 2: Find and Click on “Email Accounts”

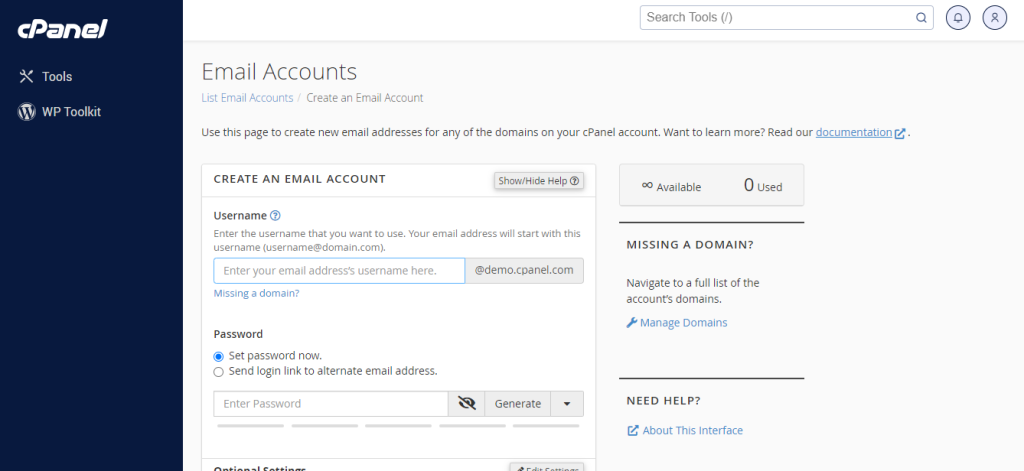
In the Email section of cPanel, look for the “Email Accounts” option. Click on it to open the email account management interface.
Step 3: Create a New Email Account
Within the Email Accounts interface, you’ll find an option to “Create.” Click on this option to initiate the setup of your new business email account.
Step 4: Fill in the Details

Now, it’s time to input the necessary details for your business email account. This includes choosing a unique username, setting a secure password, and specifying the mailbox quota. Make sure to use a strong password to enhance the security of your email account.
Step 5: Configure Additional Settings (Optional)
In the dynamic landscape of business, effective communication is the linchpin of success. One crucial aspect of professional communication is a business email that not only reflects your brand but also establishes trust with clients and partners. Fortunately, Juju Hosting’s cPanel simplifies the process of creating a business professional email. In this step-by-step guide, we’ll walk you through the process and even explore how to access your emails through Webmail.
Bonus Step: Accessing Your Business Email via Webmail
Step 6: Access Webmail
- Type “webmail.yourdomain.com” into your web browser, replacing “yourdomain.com” with your actual domain name.
- Enter your full email address and the password you set during the cPanel email account creation process.
- Choose your preferred Webmail application – Horde, Roundcube, or SquirrelMail – based on your needs and preferences.
Step 7: Customize Your Webmail Experience
Explore the settings within your chosen Webmail application to personalize your signature, adjust display preferences, and enhance your overall email management experience.
Step 8: Regularly Manage Your Email Accounts
As your business evolves, you may need to add new email accounts or update existing ones. CPanel simplifies this process, allowing you to manage and modify settings easily.
Congratulations! You’ve successfully created a business professional email with Juju Hosting’s cPanel, and now you’re equipped to streamline your communication and build trust in the business world. Whether accessing your emails through a traditional client or Webmail, cPanel offers a user-friendly experience, ensuring you can focus on what matters most – your business.


